[1].jpg)

|
for your Home & Garden |
|
|
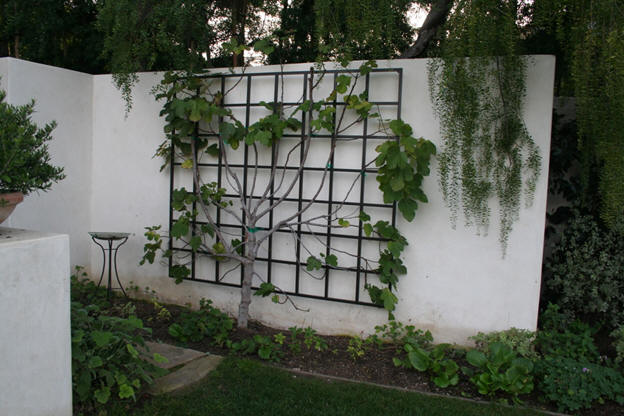
Our Trellis brackets were designed by a NASA space shuttle engineer.
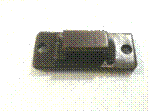
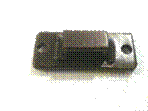
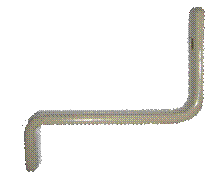
A couple years ago we were welding our trellis brackets to our trellis', (just like everyone else) this would cause breakage and bending during shipping along with stacking problems in the warehouse, the trellis' would get tangled together and the brackets would interlock causing a real mess. Upon discussion of this problem with Archie McMannen an honest to goodness NASA engineer who came up with some novel solutions to our problem. Archie solved all our mounting & shipping concerns with a simple interlocking design. 1. A 1/2 " x 1" bracket holder
is welded to the back of the trellis wherever an attachment point is needed.
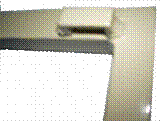
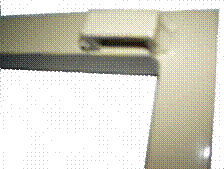
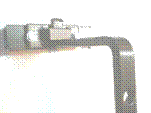
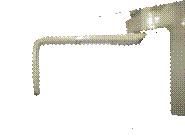
This looks like 2. The short end of the bracket slides into the above receptacle and keeps the trellis horizontally and vertically stable once the opposite end is screwed into the wall. . I believe Tapcon screws (the blue ones) are the easiest to use for installation into brick or concrete!!!! Use 1 1/2 or 2" Tapcon screws available from any hardware store. You must use the drill bit provided. Click here for Tapcon product information Over the years we have made special bracket holders for large jobs and for customers that needed to screw the bracket into a stud that was not located behind the spot we welded the bracket holder. To solve this problem we developed a bracket holder or receptor that screws into the tubing wherever you need it. We supply the self-tapping screws and all you have to do is determine where it works best on the trellis and screw them in with a powder drill.
We paint the screw heads to match the trellis. With this option you can attach the bracket in a secure location and put the holder on the right position on the trellis frame.
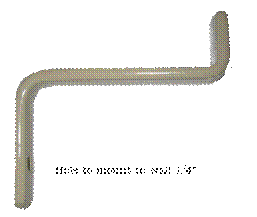
3. This design allows for not only extremely easy installation (less than 5 minutes... if you read the instructions) and the option to be locked onto the wall by putting one bracket up and one bracket down.
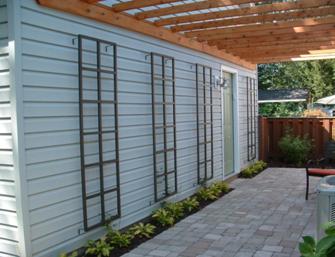
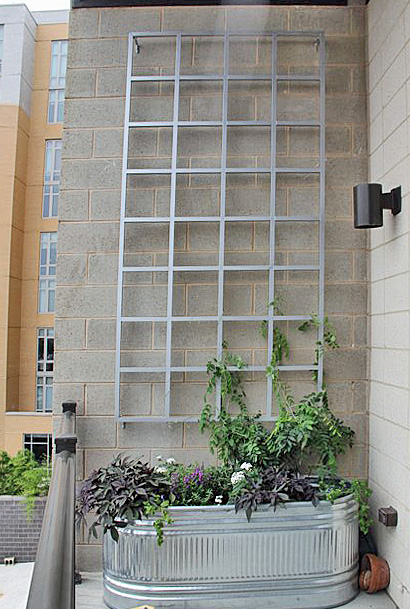
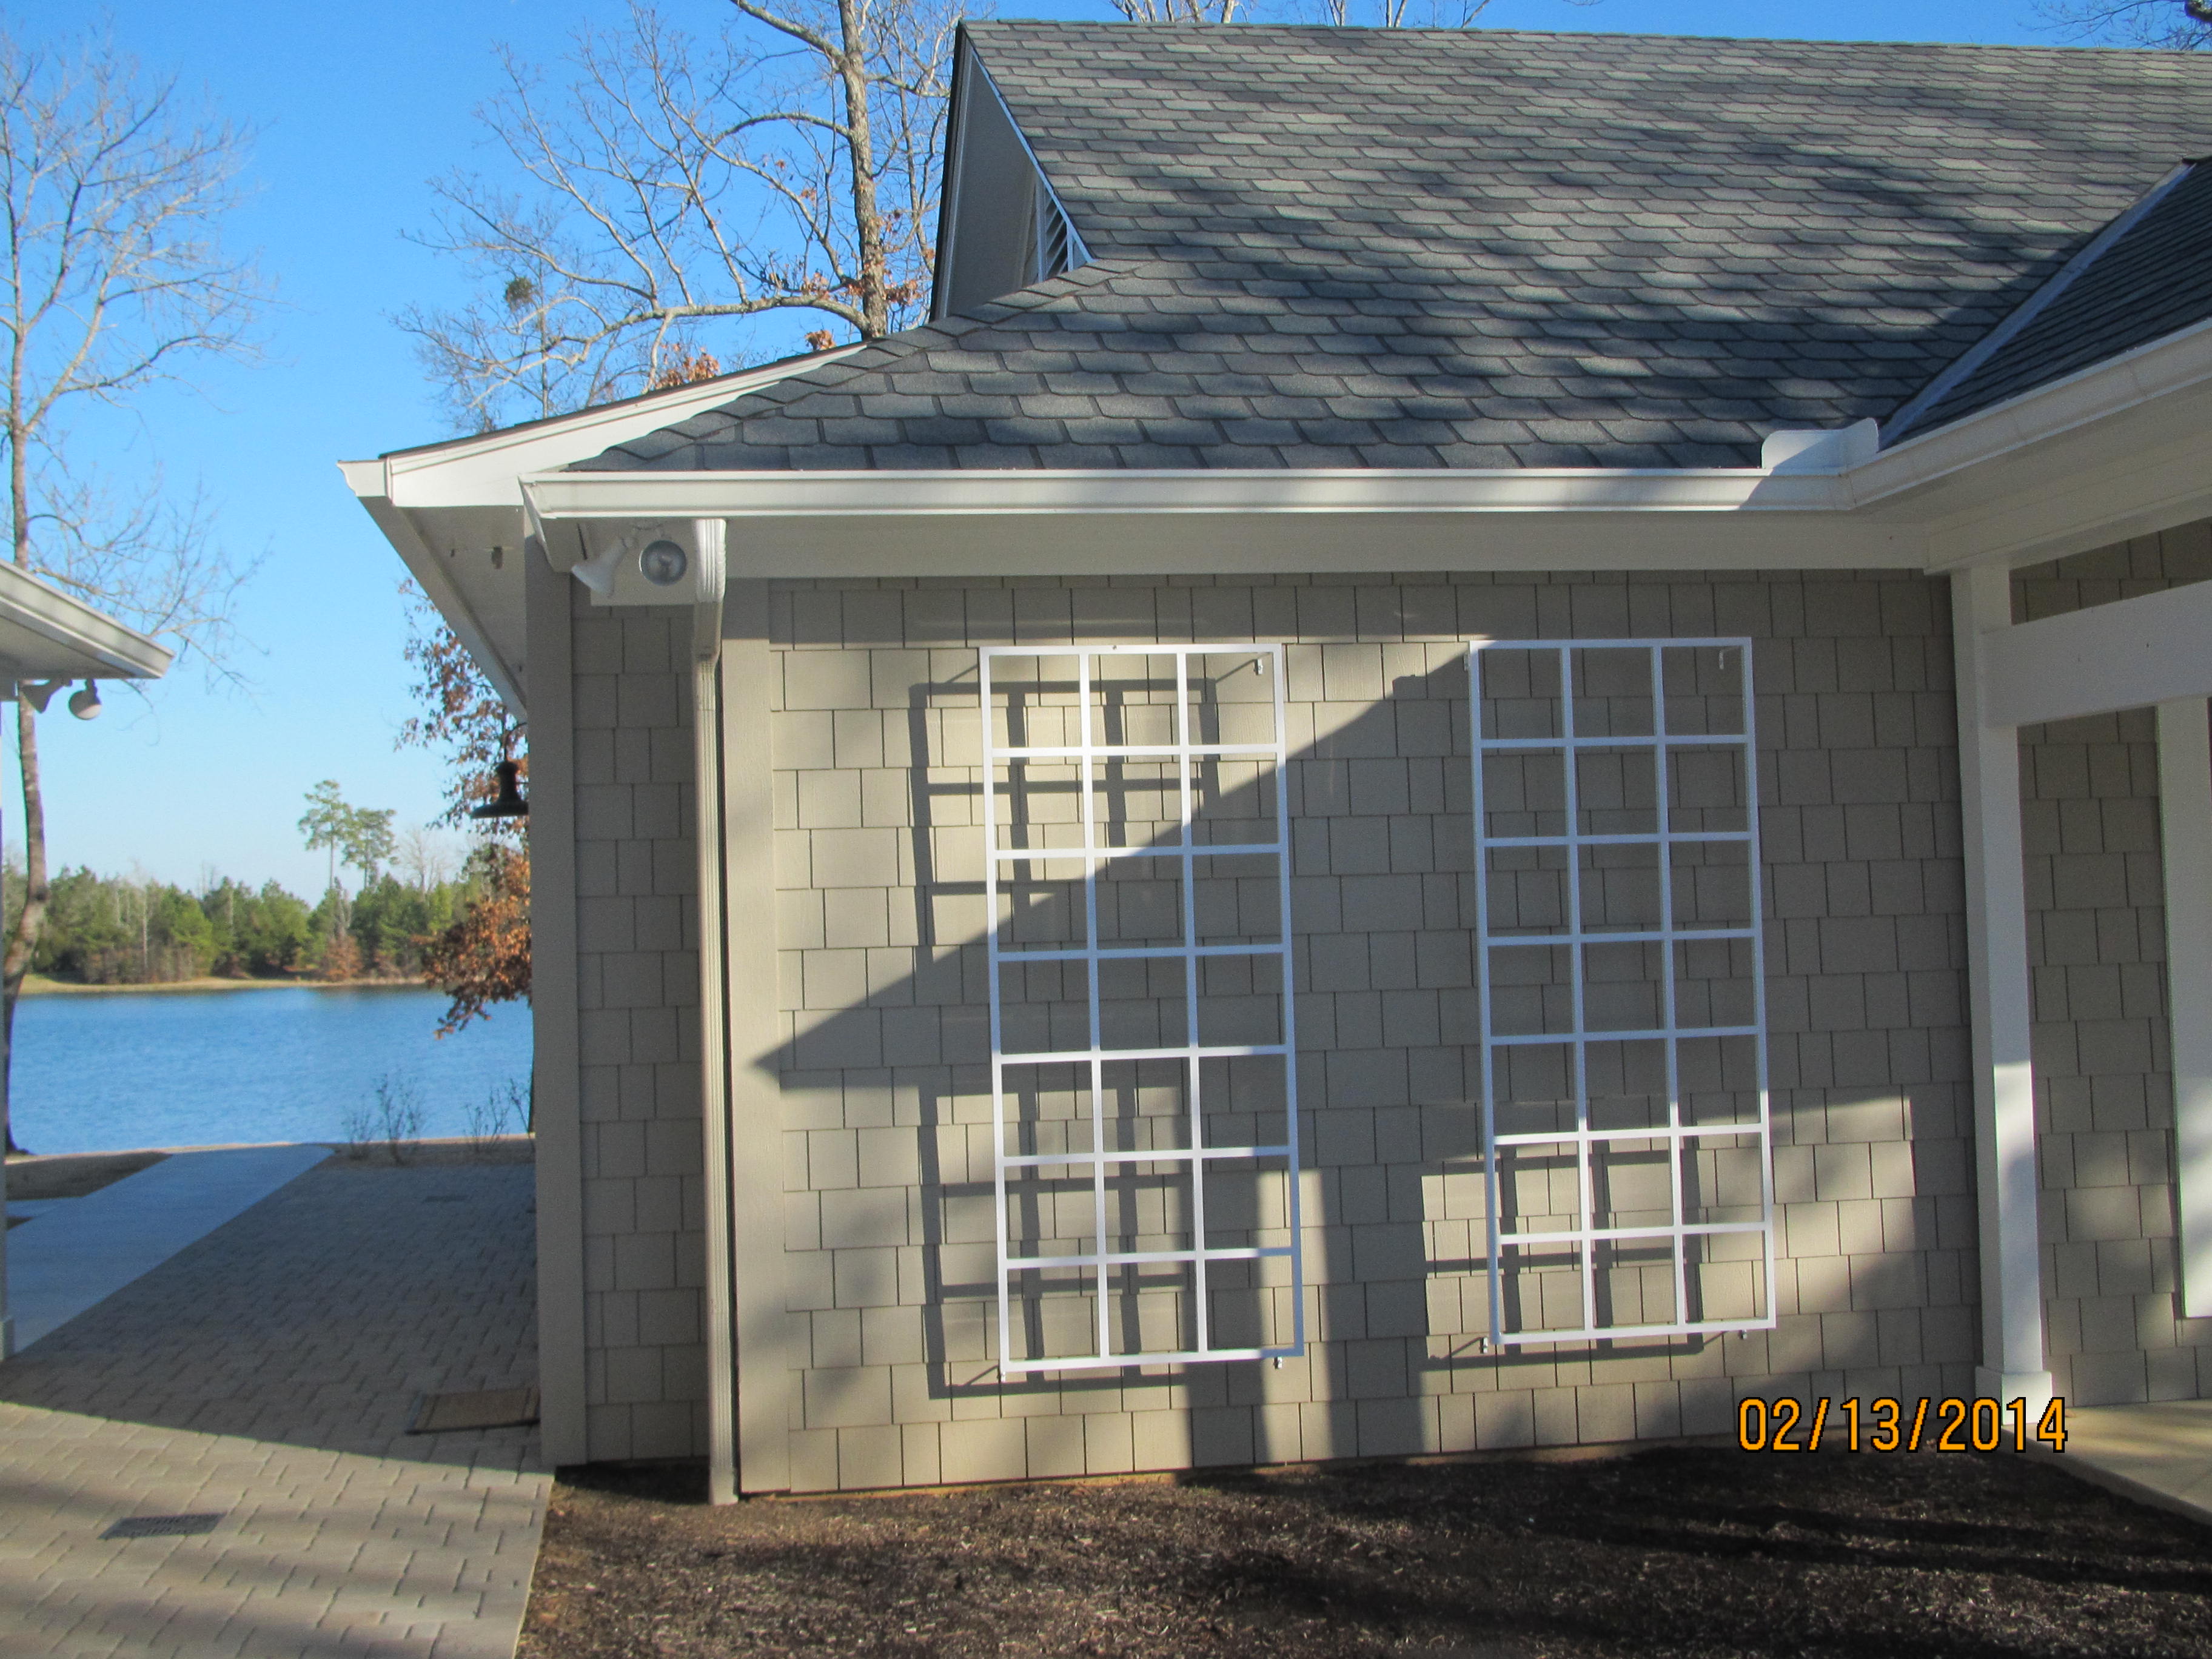
4. Finished product.
"The secret to being boring is to tell everything." - Voltaire
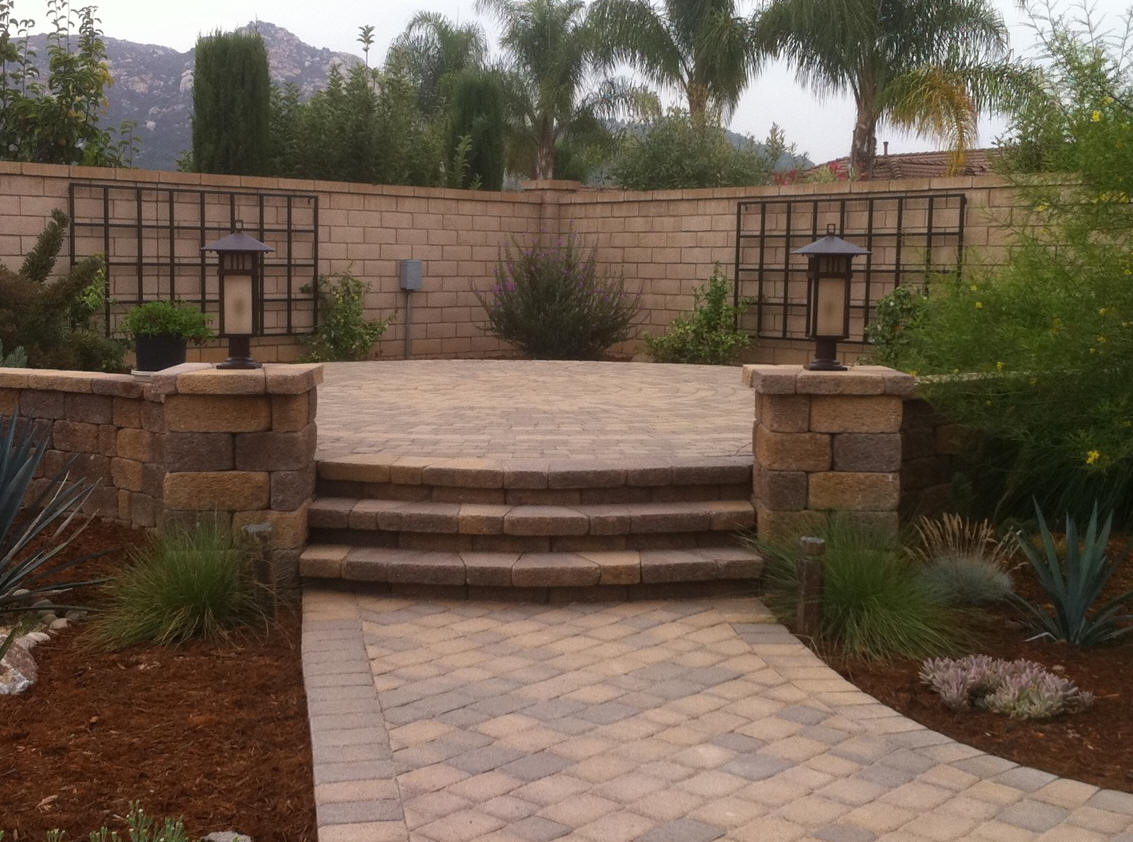
7 years or 3,242 Grid trellis later we identified and solved another installation dilemma.
Common Question: �What do I do if the bracket ends up on a crack in the siding or it does not hit a 2x4 or something strong behind the fa�ade?� We can help, you now have the option to order attachable receptors to the trellis mounting brackets instead of the welded on receptors that come standard. These 1� x 2.5� receptors can be screw on anywhere along the horizontal top and bottom frame of the trellis. This is a little more difficult and time consuming than our standard attachment but still easy as pie. 1. Find the studs (or 2x4) in the area you want to attach the trellis. 2. Place the trellis in the position you want. 3. Mark with chalk or a pencil on the trellis where the center of the stud is in relation to the trellis. 4. Attach the mounting bracket on the wall. 5. Screw the bracket receptor on to the trellis with the self-taping screws included and hang the trellis on the bracket. 6. Put a level on top of the trellis and find the next top bracket position mark hole and install. 7. Screw the bracket receptor on to the trellis with the self-taping screws included and hang the trellis on the bracket. 8. Make sure level and repeat on the bottom with the trellis hanging by the top brackets.
Contact Information:
Telephone
800.296.0418 FAX 800.296.0418 Postal Address P.O. Box 41 Pineola, NC 28662 Electronic mail Gardenmetalwork@yahoo.com
|